

Before I could begin weaving the warp smoothly, there were a few warp threads that became trapped and snapped under tension. This was probably a symptom of the tangles experienced when I released the warp for dipping.
read post about Dip-Dyeing the Warp and the near disaster I had with the tension.
To fix a broken warp thread, I needed to first locate the end still attached to the back beam and attach a new length of warp to the snapped thread with a weavers knot (pictured below)
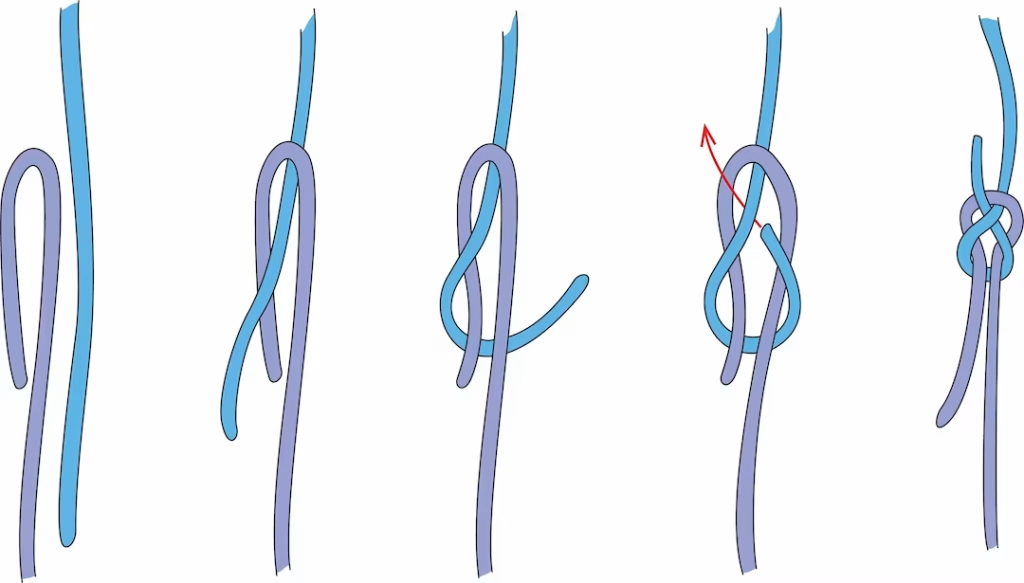
Sourced from https://littlelooms.com/an-introduction-to-the-weaver-s-knot/


Pictured above left, you can see a completed weavers knot in my warp. This know it strong enough to hold the tension, but small and flat enough to pass through the dents.
Pictures above right is a damaged dent (heddle tooth), again caused by the tangled mess created by releasing the warp. I cut the caught warp thread out and fixed it with the weavers know method here too. I will have to watch the rough burrs that are now on the bent dent as they may fray more of the warp threads as I weave.


I felt really proud of how after my previous ‘disaster’ with the warp, I was able to pull the project back, solve problems and end up with what I had envisaged in my final piece. It has taught me to stop and breath when things go wrong and realise that I do have the resilience and skill to find a solution.